A Step-by-step Guide to Making a Sourdough Starter (and Maintaining One)
Sourdough isn’t for everyone. Making it, eating it, maintaining it. There are plenty of preferments that can add great complexity, flavor and texture to your dough – and extend its shelf life. I’ve made dough with most of these, but once I started experimenting with sourdough, there was no turning back. The difference is that while other preferments (such as a biga or poolish) are created by combining commercial yeast with flour and water, sourdough is a natural yeast.
Since sourdough is a living thing, there are a lot of factors that can alter how your dough turns out. Everyone’s starter will be a little different – even if you use the exact same flour and water. This is because sourdough feeds off the natural bacteria in the air and the sugar in the flour to create wild yeast. Just like all dough making, time and temperature are important considerations.
Before you try to make dough with sourdough, learning how to create and maintain your sourdough starter is essential. How well you do this will directly affect the quality and outcome of your dough. This means what you feed it, how often you feed it and the environment where it lives all contribute to its flavor and the activity of the yeast. All of this might sound intimidating for those beginning their journey with sourdough, but starters are incredibly resilient.
Broken down, a sourdough starter (also called a natural leaven, leaven or starter) is simply a mix of flour and water that hosts a stable blend of beneficial bacteria and wild yeast. All you need to make your own is flour, water and time – all things you already have in your shop! Maintaining a healthy starter requires regular feedings. A feeding is when you take out the majority of old starter and replenish it with fresh flour and water. I like to feed mine twice a day with equal parts flour and water. Your starter will stay healthier and more consistent the more often you feed it.

Since you only add two ingredients to a starter, the quality of each is important. If you live in an area that does not have drinkable tap water – or you’re in a city that uses chloramine or chlorine to clean the water – you might want to use bottled or filtered water in your starter. The flour you use also will impact the taste of your starter and pizza dough as well as the fermentation process. Using a flour that is higher in nutrients and sugars, such as whole-grain flour, will expedite the fermentation process. A white flour will form a stronger gluten net and has increased gas-trapping ability. By combining the two flours, you can get the best of both. Also: Make sure there aren’t any additives in your flour; they can kill the wild yeast and create mold.
One of the many great things about sourdough starters is that they are hard to ruin. If you forget to feed your starter for a day or even two, they almost always pop back to life once you refresh them. If you’re not a daily baker, you can put your starter in your fridge or even dry it out, then refresh it the day before you plan on making bread or pizza dough. The flavor, texture and digestibility that sourdough starters provide make the extra effort more than worth it.
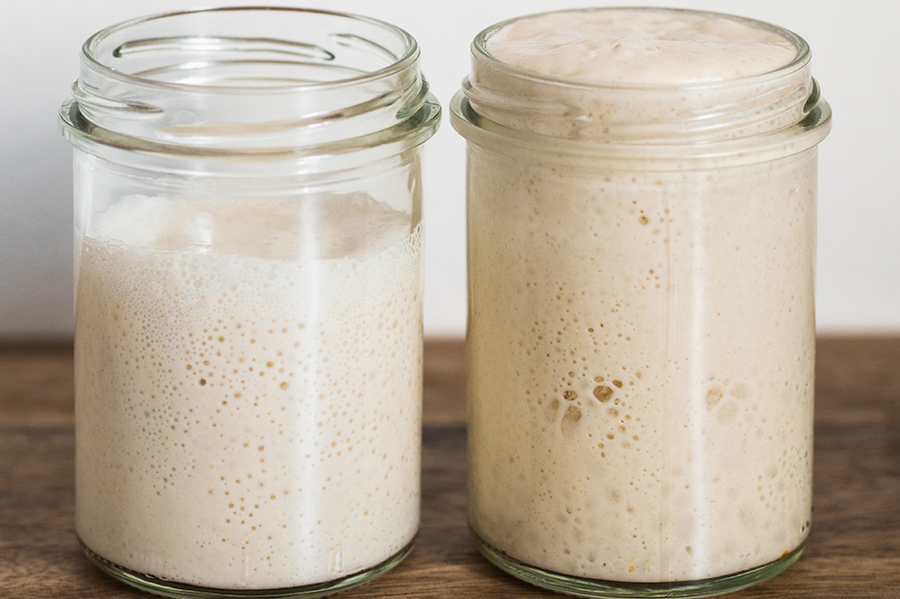
It takes five to nine days to make your starter. As soon as you feed it, the yeast and bacteria in your culture will begin to metabolize the sugars in the flour, creating carbon dioxide gasses as a byproduct. These gasses cause the starter to rise throughout the day. Once they’ve eaten all the fresh food, the lactic and acetic acid begin to break down the gluten, causing the starter to fall and create a sour or vinegary smell. This is why I like to use my starter right before it peaks, when lots of gas is being produced and the fermentation activity is strong. It gives the final product a fresh, almost floral taste as opposed to a more acidic, sour flavor. Since the yeast is beginning to die when the starter falls, using it after its peak creates a very dense and flat crust that won’t brown in the oven.
The Sourdough Starter Guide (see table below) is a recipe to help get you started. Once you have an active starter and are regularly feeding it, the quality of your dough will become consistent. Keep in mind that the amount of fresh flour and water you feed your starter before making dough will depend on the quantity you need for your recipe. For example, if you are making a batch of dough with a 50-pound bag of flour and are using 8 percent starter, you would need 4 pounds of starter. To create this, you would feed your starter with
2 pounds of flour and 2 pounds of water.
I like to create starter out of freshly milled, whole-grain flour since it is rich in nutrients, bacteria and yeast. You will be able to see signs of activity much more quickly than if you use white flour alone. The temperature of the room and water you use also will affect the fermentation. Yeast proliferates more quickly in a warm environment than a cold one.
Audrey Kelly owns Audrey Jane’s Pizza Garage in Boulder, Colorado.
Sourdough Starter Guide |
|
|---|---|
| Tools | 2 large glass jars with lids (placed loosely on jars) |
| Kitchen scale | |
| Small rubber spatula | |
| Rubber band or marker
|
|
| At each feeding | Place a clean jar on your scale and scoop in some portion (outlined below) from the jar containing your starter. |
| Add fresh flour and water; mix well to incorporate completely. | |
| Cover the jar loosely and let rest until the next feeding. | |
| Day 1 | Place an empty jar on your scale and zero out the scale. |
| Add 125 grams whole-grain flour and 125 grams warm water (about 80 degrees F). | |
| Stir together. | |
| Place lid loosely on the jar (you want a little air to be able to get in and some gasses to escape). | |
| Mark the mixture’s height on the jar with a rubber band or marker. | |
| Set the jar aside on the counter, out of direct sunlight but not in a cold area. | |
| Day 2 | Place a different clean jar on scale and zero out. |
| Add 75 grams of the starter mixture you made the day before to a clean jar. | |
| Add 50 grams of whole-grain flour and 50 grams of white bread flour. | |
| Add 100 grams of warm water. | |
| Stir it all together and place a lid loosely on top. | |
| Mark the mixture height on the jar with a rubber band or marker. | |
| Set aside. | |
| Day 3 | Repeat the same process as Day 2. |
| Days 4, 5 and 6 | You will start to see some activity in your starter, and it will take on a sour smell. |
| Repeat the process from Day 2 and 3 – but instead of doing it only once a day, you will do it twice a day, 12 hours apart. | |
| Days 7, 8 and 9 | Repeat the process twice a day but use less starter in the mix. Instead of putting in 75 grams of starter, use only 20 grams. At this point, I also use less whole-grain flour and use more white bread flour. The less old starter you use, the more fresh starter food (and, thus, fermentation) there will be. By this point, your starter will be ready to use in your dough recipe. |
| Place a clean jar on kitchen scale and zero out. | |
| Add 20 grams of starter. | |
| Add 20 grams of whole-grain flour and 80 grams of bread flour. | |
| Add 100 grams of warm water. | |
| Place lid loosely on jar and set aside until next feeding. | |
| Mark height of the mixture on the jar with a rubber band or marker. | |
 Read the August 2025 Issue of Pizza Today Magazine
In this issue, we announce Pizza Today’s 2025 Pizzeria of the Year. Find out how the owners turned a failing pizzeria purchase into a fast-growing pizza business. Learn how to make a sourdough starter. It’s Green Season! Green Chile, that is. Explore menu ideas that add New Mexican flavors to your pizza. Find out which strip mall locations work best for pizzerias – and how to maximize traffic. Discover why pizzerias are going with custom mobile apps to capture sales and return visits. Tap into addictive bar menu options to increase check averages. Go to the August Issue.
