Learn the Formula to Making Baked Pasta Dishes That Are a Hit
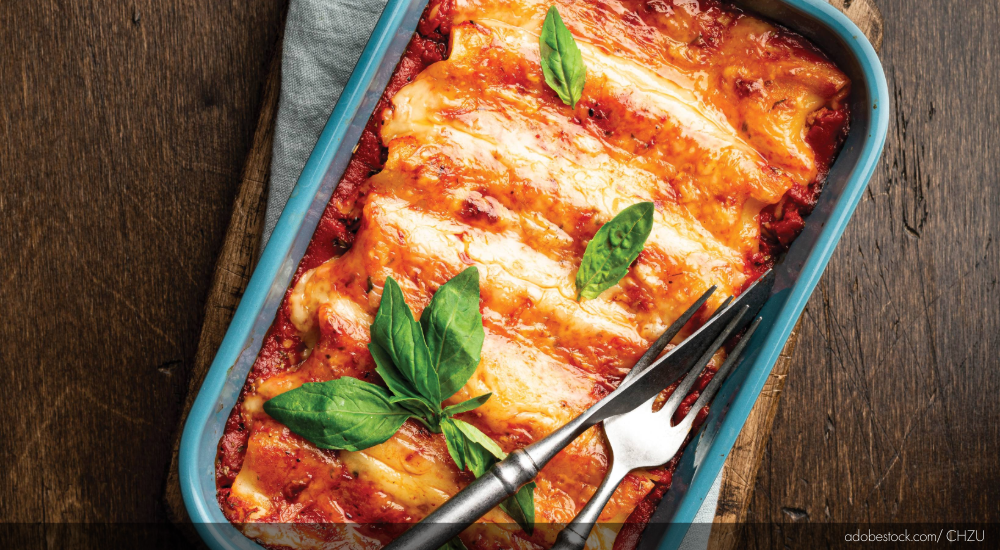
I’ll admit it – when it comes to cheese, I’m shameless. Melt it, stretch it, bake it or broil it – I’m in! I’m also the reason so many of us have to use portion controls, like weighing cheese on the pizza line. I just can’t get enough, and that goes for ooey-gooey baked pasta dishes, too. What’s better than baked ziti topped with perfectly broiled mozz on a cold day, or lasagna layered with a delicious bolognese and cheese nestled between tender pasta sheets? That’s my jam!
Turning your love of cheese into a crave-worthy baked pasta takes a little know-how. There’s a formula to the madness – the right sauce, the right cheese and just the right bake.
Composing a Great Baked Pasta
The right amount of sauce: When you’re melting the cheese – whether in a salamander, cheese melter or broiler – you’re adding additional heat to the dish, which dries the sauce a bit. Factor that in when you decide how much sauce to use.
Cheese appearance matters: Anything less than brown, bubbly and completely melted is unacceptable in my book. White, slimy, half-melted cheese? A deal-breaker. If the individual shreds are still defined, it didn’t get hot enough. High-quality cheese is vital for that picture-perfect cheese pull – the hallmark of a great baked pasta.

Choosing the Right Mozzarella
Look for a balanced, low-moisture, whole-milk or part-skim cheese with about 4% butterfat to give you that silky stretch without oiling off. The fat liquefies just as the protein matrix relaxes, flowing evenly instead of blistering or separating, so every bite has the same gooey texture.
If you’re using pre-shredded cheese, choose one without starches, cellulose or anti-caking agents. Those additives interfere with heat transfer and protein binding, dulling meltability and browning. Cheeses with those agents tend to crisp on top but never truly melt – leaving that weird lattice “scab” instead of a gooey blanket that mingles with the sauce.
When adding proteins such as meatballs or sausage, toss them in sauce and tuck them under the cheese to keep them from drying out.
I prefer a low-moisture, pre-sliced, whole-milk mozzarella. It provides perfect portion control and even coverage, ensuring every bit melts thoroughly.
Pro tip: Don’t overlap the slices – the bottom layer will not melt completely, and your guest will not fully appreciate how much cheese is on the plate. Maximize the surface area of the cheese.
Speaking of surface area – plating matters! Choose a dish wide enough to show off that layer of brown, bubbly cheese. That’s the money shot. When the plate hits the table, I want guests so excited that they’re willing to risk a little roof-of-the-mouth burn just to dive in. (I totally resemble that remark.)
Takeout and Catering
Take out
For me it’s still the classic foil tin with a chipboard lid and that awful little foil rim that you fold over to seal – and inevitably slice your finger on. Worth it! I love that old-school feel; it reminds me of my favorite Italian spot as a kid. More importantly, it allows you to broil and serve in the same container without disturbing that sexy cheese. I prefer a shallow, wide pan so the cheese covers as much surface area as possible.
Catering
In catering (as with everything), consistency is key. At Wholly Stromboli, each pan is weighed for the correct amount of pasta, sauce and cheese.
Lasagna can turn soupy in a heartbeat. More isn’t always better – grab a scale, not a measuring cup – we’re going by weight, not volume! Everyone’s idea of “a heaping cup” or “a good handful of cheese” is different, and those little variations add up fast. Weigh each layer, and you’ll get the perfect balance every time.
For catering and takeout, I find it important to choose a container that’s slightly deeper than the combined volume of pasta, sauce and cheese you’re putting into it. There’s nothing worse than when your beautifully melted cheese sticks to the lid; not only does it ruin the visual appeal by exposing the pasta underneath, but it also robs the guest of that highly sought-after top layer of cheese. I like to leave about ¾-inch of headroom to prevent that – especially if containers get tilted in transit or stacked during catering.
It’s also worth considering providing simple reheating instructions for baked pasta dishes. The downside to those classic foil pans (besides the inevitable battle with the crimped edges) is that they’re not microwave-safe and do not retain heat as well as their plastic cousins. Fortunately, it’s easy for guests to transfer their portion to a plate or pop the pan into a toaster oven to reheat – and it still tastes like it just came out of the kitchen.
Take & Bake Options
I think there’s real value in offering take-and-bake pasta dishes. They’re perfect for guests who want that fresh-from-the-oven experience at home.
Pro Tips:
- Make sure all proteins are fully cooked before assembly. Guests are only reheating the pasta, warming the sauce and melting the cheese.
- Include clear reheating instructions. A simple note goes a long way toward ensuring guests get the best results.
- Keep in mind that pasta will absorb some of the sauce while refrigerated. To compensate, increase the amount of sauce slightly or include an extra side of sauce for guests to add before reheating.
Methods of Melting
If you haven’t figured it out already, I’m a fanatic about melted cheese. During our kitchen-expansion planning, I tested every melting method known to humankind: my trusty deck oven (we call him Vincenzo), a few conveyors, broilers, salamanders and even a torch (not recommended!). The deck oven doesn’t give enough top heat and takes forever to brown. The conveyor dries out the pasta before the cheese melts. In the end, “Sally” the salamander wins for color and melt.
But after 15 years of asking, I still wondered: What’s the actual difference between a salamander, cheese melter and broiler? Here’s what I learned …
Salamander Broiler
Purpose: High-intensity finishing tool
Heat: 1,600–2,000 F radiant
Use: Browning or caramelizing tops of gratins, baked ziti and lasagna
Features: Gas or electric, instant-on infrared burners, adjustable rack height, wall-mounted under the hood
Pros: Fast, powerful, professional results
Cons: Look away for 2 seconds, and it’s burnt
Cheese Melter
Purpose: Gentle, consistent finishing
Heat: 400–600 F radiant
Use: Evenly melting cheese on nachos, sandwiches or warming plates
Features: Usually electric, fixed rack height, wide opening for tall items
Pros: Simple, energy-efficient
Cons: Won’t brown or caramelize – just melts
Broiler (aka Overhead or Deck Broiler)
Purpose: heavy-duty, high-volume cooking
Heat: up to 2,000+ F
Use: Steaks, chops, seafood or browning large pans of casseroles
Features: Part of a range or standalone deck, adjustable grate or shelf, gas flame or electric coil
Pros: Versatile and powerful
Cons: Slower recovery between loads; bulkier footprint
Now that you know the difference between the three cheese-melting power tools, why is it called a salamander? Well, my friends, while I do have the answer to that burning question, you’ll have to catch me at Pizza Expo to hear it in person.
Until then, happy broiling!
MELISSA RICKMAN is co-founder of Wholly Stromboli in Fort Lupton, Colorado, and member of the World Pizza Champions.
